
SET UP. CHECK. GET BACK OUTSIDE.
Solar Fan Hat Setup & Troubleshooting
Set the fit, aim the two fans, understand the controls and check solar or USB-C output on your F2 hat.
Choose a different product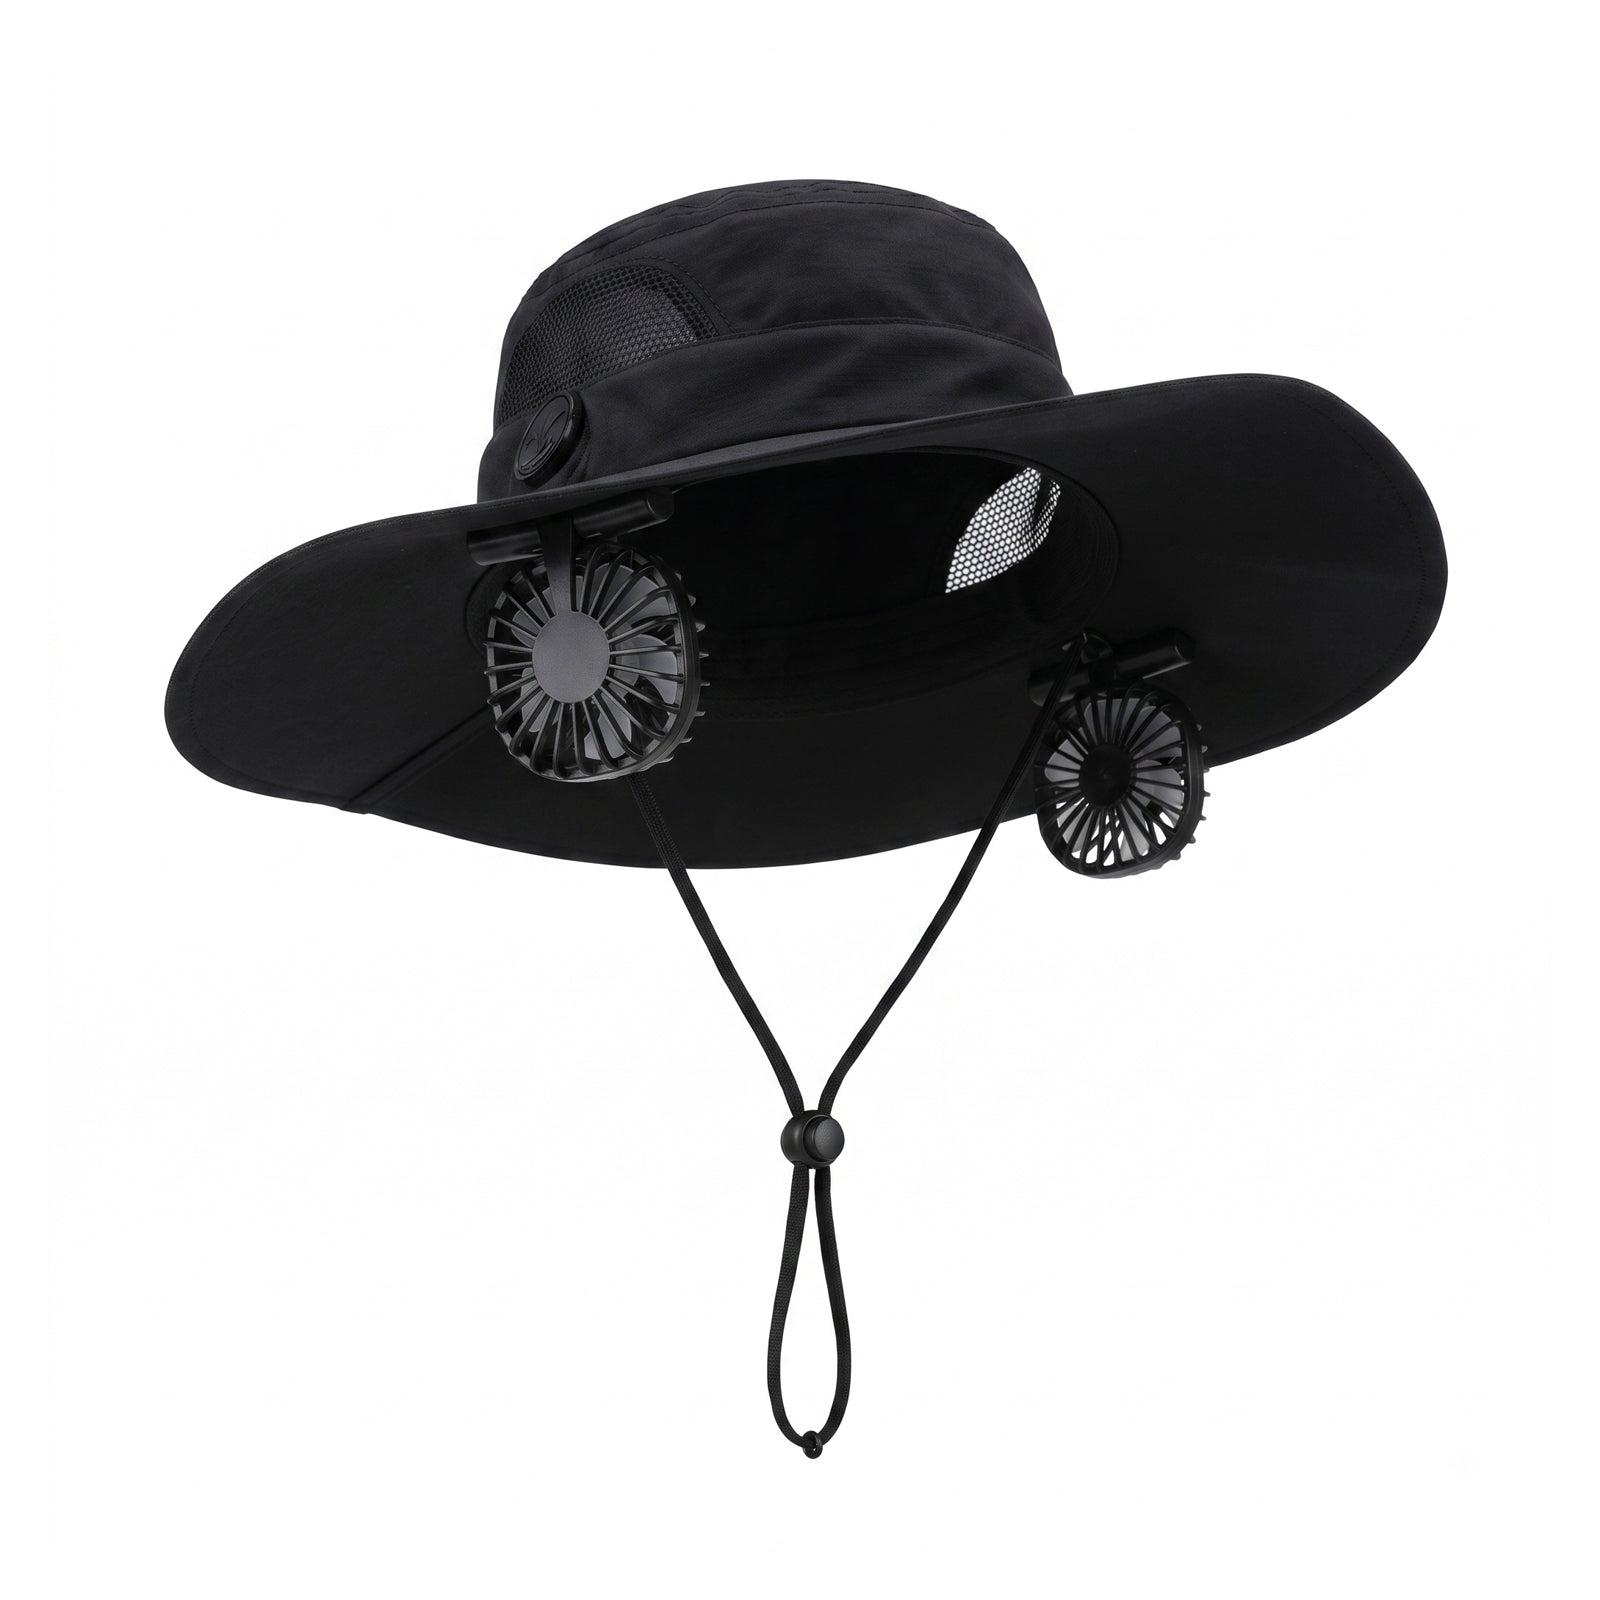
Keep hair, fingers, cords and loose objects away from the fan openings. Stop using the hat if a fan guard, housing or wire is damaged. It is not a safety helmet or a substitute for heat-safety precautions.
QUICK ANSWERS
Know these four things first.
- Fit: adjust the rear knob and chin cord before moving; the stated head range is 59–61 cm.
- Fans: two modules angle from 0–75°; short presses cycle through three speeds and off.
- Solar: 12W is the panel's maximum rating, not constant outdoor output.
- USB-C: output is rated up to DC 5V/2A for compatible devices; fast charging is not claimed.
GET TO KNOW YOUR GEAR
Start here.
Illustrations are taken from this product's supplied manual. Page references count the PDF cover as page 1. Select an illustration to view it larger.
Set the fit before moving
- Put the hat on and use the rear adjustment knob: press and turn clockwise to tighten; turn counterclockwise to loosen.
- Set the chin cord so the brim stays secure without discomfort.
- Tie back long hair and move cords away from both fan openings.
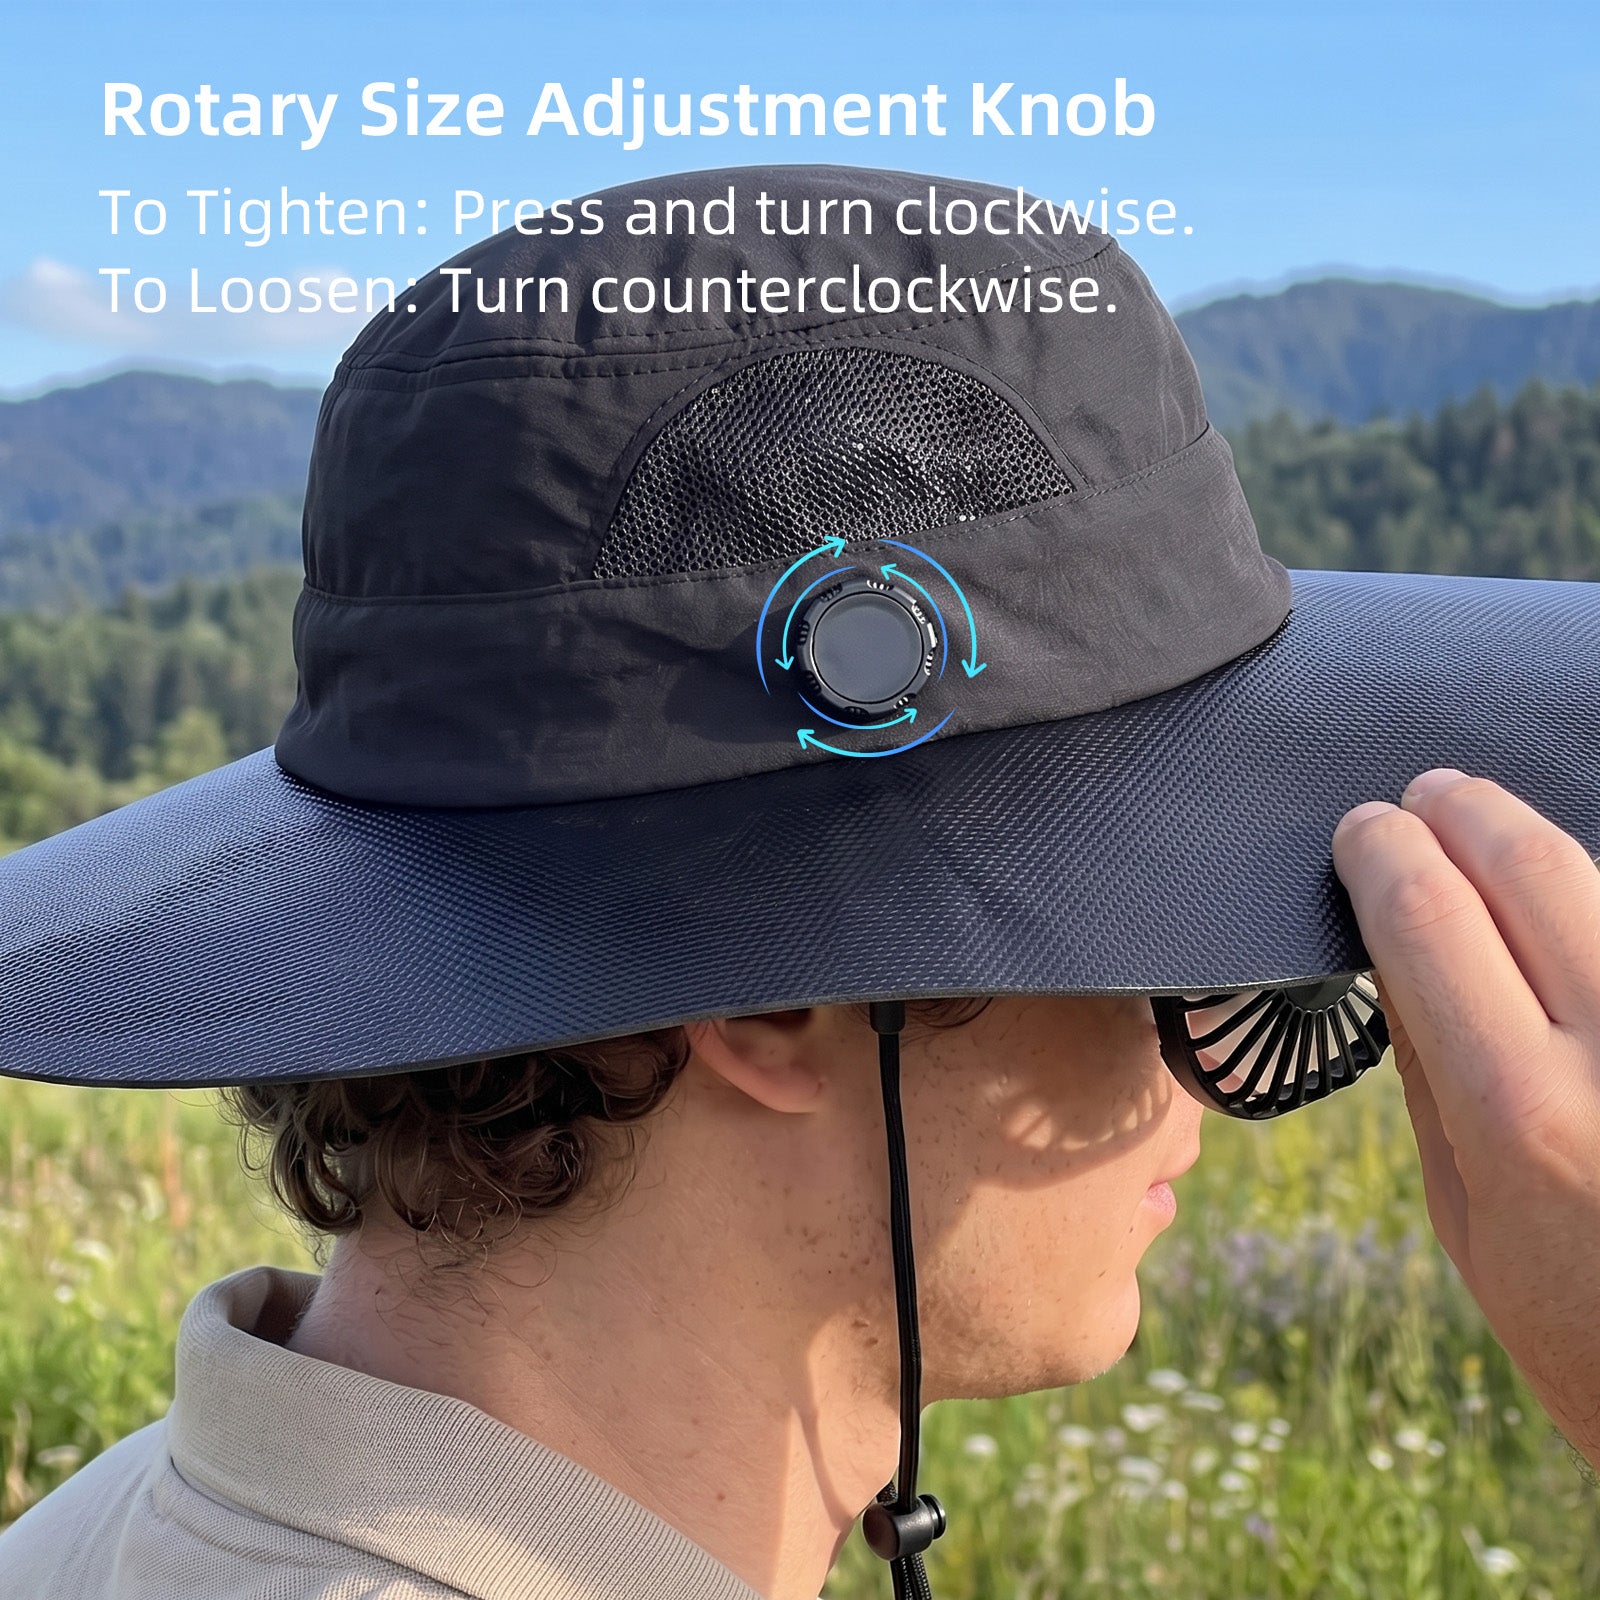
Rear knob and chin cord help set the fit before outdoor use. Aim the fans and choose a speed
- Angle the two fan modules toward the airflow position you want, within their stated 0–75° range. Do not force them beyond their travel.
- Short-press the control button to cycle through Gear 1, Gear 2, Gear 3 and off.
- Hold the button for about three seconds to enter sleep mode. Do not use the fan if a guard or housing is damaged.

Set fan angles and cycle through three airflow settings. Read the status lights
The green light stays on while the solar panel is working. At power-on, the blue light indicates battery status:
- Steady blue: above 80%.
- Three blue flashes, then off; 1.5-second interval: 20%–80%.
- Three blue flashes, then off; 0.5-second interval: below 20%.
Use these indicators as a guide to battery status, not as a fault diagnosis. Keep the panel clean and uncovered; sunlight, shade and fan load affect charging.
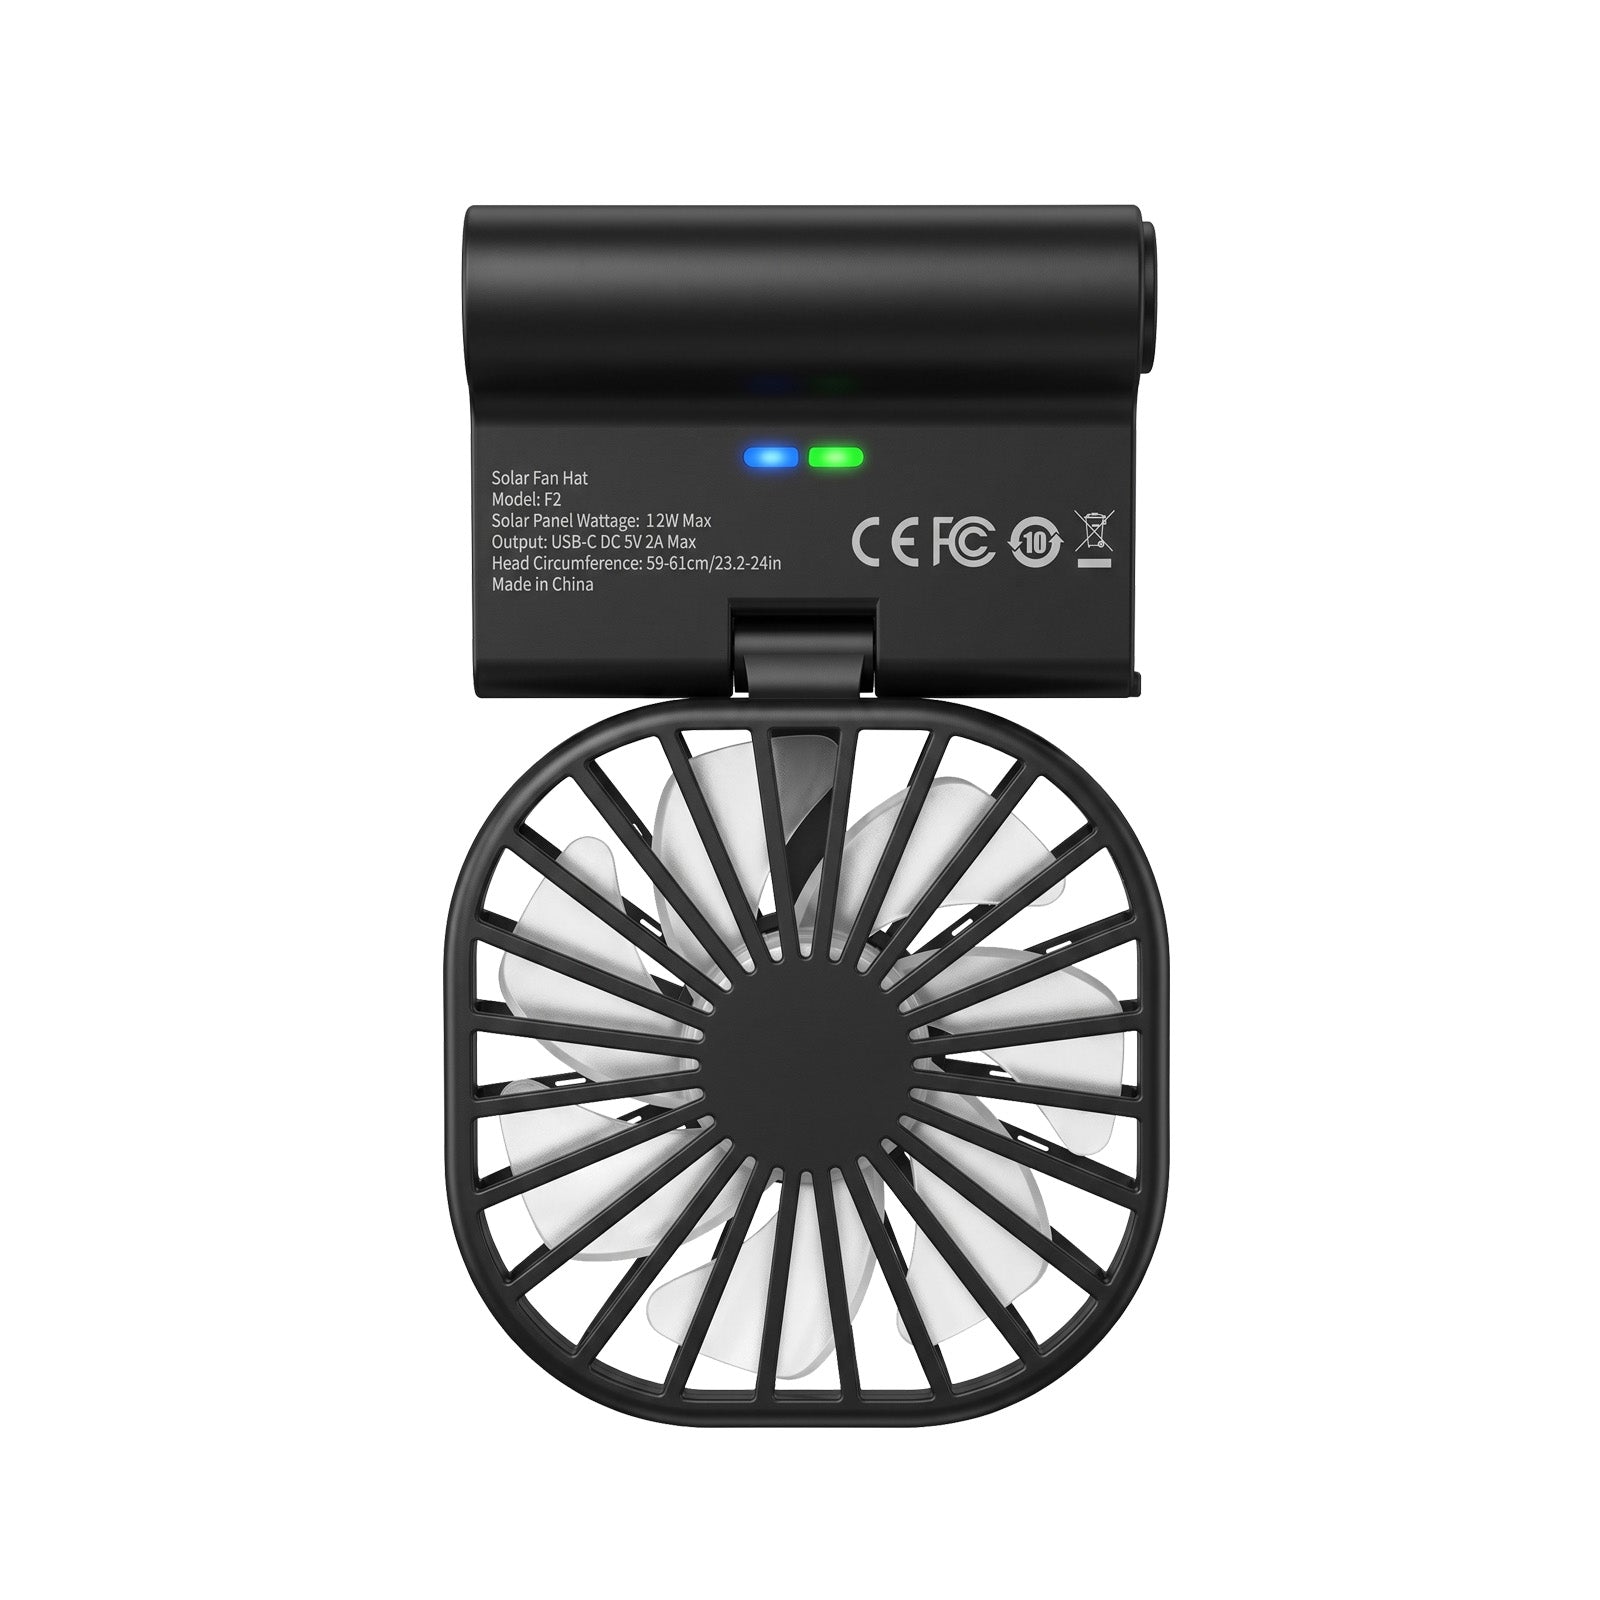
Green indicates solar activity; blue indicates the battery status described above. Use the USB-C output conservatively
- Identify the USB-C port on the fan/control module.
- With the panel exposed to suitable sunlight, connect a compatible device using a suitable cable.
- Expect output to vary with light, shade, cable, device compatibility and simultaneous fan use. The stated maximum is DC 5V/2A; this is not a fast-charging or guaranteed charging-time claim.
The USB-C port is output-only. It cannot be used to charge the hat from an external power source.

Locate the USB-C output on the fan/control module.


FIND YOUR SYMPTOM
Let's work through it.
Open the question that matches your issue. These checks do not require opening or repairing the electronics.
The fans do not start
Check in this order
- Check that loose hair or objects are not blocking either fan; do not put a finger inside.
- With the hat dry and undamaged, short-press the control button and observe whether a speed starts.
- Expose the solar panel to steady, unobstructed sunlight and note the green indicator. Read the blue-light battery-status guide above. The USB-C port is not a charging input.
What to look for: A short press should select the next speed when the system can run.
If it is still unresolved: Stop if the fan guard or wiring is damaged. Report the button and light behavior; do not open the electronics.
Current product page: Indicators & Operation; safety guidance.
Get help with this product ↓Airflow feels weak or one fan seems blocked
Check in this order
- Check whether you selected Gear 1; short-press to compare the three settings.
- Re-aim both fan modules without forcing them beyond 0–75°.
- Switch off and inspect the guards for loose hair, cords or surface debris. Keep fingers out of the openings.
What to look for: Compare both fans at the same setting after their openings are clear.
If it is still unresolved: If one fan still fails or a guard is damaged, stop using the hat and tell us which side is affected.
Current product page: Three-Speed Fans, Interface & Fit and safety FAQ.
Get help with this product ↓The green solar light is off or solar output seems low
Check in this order
- Check that the panel is clean and fully uncovered.
- Move to steady, direct sunlight and orient the brim to reduce shade.
- Observe again without assuming the 12W maximum is available continuously. Clouds, panel direction, temperature and connected load change output.
What to look for: The green indicator is the published signal that the panel is working; outdoor output can still vary.
If it is still unresolved: Tell us the light conditions, green-light behavior and whether the fans were running.
Current product page: Integrated Solar and Indicators & Operation.
Get help with this product ↓A device does not charge from USB-C
Check in this order
- Confirm you are using the hat's USB-C output with a compatible device and suitable cable.
- Check direct sunlight, partial shade and the solar indicator.
- If safe, compare with the fans off; simultaneous fan use affects available power. Do not expect fast charging.
What to look for: A compatible device may accept power when suitable sunlight and available output are present; the 5V/2A figure is a maximum rating.
If it is still unresolved: Report the device, cable, light conditions and fan setting. Do not connect the solar port directly to a laptop.
Current product page: USB-C Power Output and FAQ; product-wide solar-to-laptop safety boundary.
Get help with this product ↓USB-C charging starts and stops
Check in this order
- Check whether passing shade, movement or changing brim angle is interrupting sunlight.
- Check the cable and device connection without forcing the port.
- Compare the behavior with a lower fan setting or fans off, when safe.
What to look for: Changing sunlight and fan load can change the power available to the device.
If it is still unresolved: Tell us when the interruption occurs and which cable and device are connected.
Current product page: USB-C Power Output and Solar Output notice.
Get help with this product ↓What does the blue light mean?
Check in this order
The green light stays on while the solar panel is working. At power-on, the blue light indicates battery status:
- Steady blue: above 80%.
- Three blue flashes, then off; 1.5-second interval: 20%–80%.
- Three blue flashes, then off; 0.5-second interval: below 20%.
Use these indicators as a guide to battery status, not as a fault diagnosis. Keep the panel clean and uncovered; sunlight, shade and fan load affect charging.
What to look for: If the light behavior differs from this guide or the hat will not operate after suitable solar charging, contact support.
If it is still unresolved: Tell us whether it is steady or flashing and what the fans do at the same time.
Current product page: Indicators & Operation; full pattern chart not online.
Get help with this product ↓The hat or its electronics got wet
Check in this order
- Switch the fan system off and disconnect any device.
- Wipe external moisture with a soft cloth and let every part dry completely at room temperature.
- Do not soak, machine-wash, submerge or operate damaged electronics. Avoid heavy rain until a verified water-resistance rating is published.
What to look for: The hat and port should be completely dry before any further use.
If it is still unresolved: If water entered the control module or the fans behave abnormally after drying, stop use and contact support.
Current product page: Cleaning & Care and rain FAQ.
Get help with this product ↓A fan guard, housing, cable or port is damaged
Check in this order
- Switch off, disconnect any device and keep fingers away from the fan openings.
- Do not open the control module, repair wiring or force a damaged connector.
- Keep the product aside and prepare the order details for support.
What to look for: No further operation is needed to confirm visible damage.
If it is still unresolved: Contact us with the affected part and purchase details; photos can be requested by email.
Current product page: safety FAQ and product support guidance.
Get help with this product ↓KEEP IT READY
Care & storage.
Switch the fan system off before cleaning. Use a soft, lightly damp cloth on the exterior and solar surface, keeping water away from the USB-C port, fans and controls. Do not soak, machine-wash or submerge the electronic parts.
Let the hat dry completely before use or storage. Avoid abrasive or corrosive cleaners, heavy rain and damaged fan guards. Keep loose hair and cords away from the fan openings.
Current Solar Fan Hat product page: Cleaning & Care and FAQ.
THE COMPLETE REFERENCE
Your product manual.
Solar Fan Hat · English PDF · 9 pages · 12.52 MB · Revised September 17, 2026
Download manual ↗ All manualsSTILL NEED A HAND?
Tell us what happened.
This request includes your product: Solar Fan Hat.
Include your order number, F2 model, the fan speed or light behavior, sunlight conditions, any connected device and cable, and the checks you already tried. We can request photos by email if needed.
Do not include passwords, payment details or identity documents.